Tuesday 30 December 2014

Review: Powder Perfect Organic Chocolate Cute-icle Balm

Hi Guys!

Today I am sharing my thoughts on Powder Perfect's Organic Chocolate Cute-icle Balm, which was provided to me by Jacinta for review.


**Disclaimer** To gauge how well this product worked, no other cuticle balms, oils, etc. were used with this Cute-icle Balm. I applied it several times, as I felt needed, on a daily basis as well as my usual hand cream once a day. I also refrained from trimming any bits of dry or rough skin during this time.

With the busy period upon me, my poor cuticles were a little neglected (unintentionally, of course) and they became quite rough and dry. Before all the carelessness occurred, Burt Bee's Lemon Cuticle Balm was a staple in my nail care routine, which is said to be the Holy Grail of cuticle products among Nail Artists and Bloggers.

Naturally, when I received Powder Perfect's Cute-icle Balm, I was extremely curious to see if it could step up to the plate.

Before: December 17th, 2014

My first thought when I unwrapped the Cute-icle Balm was that the tin was super cute! Secondly, it smelled delectable - edible, almost! This was a huge plus for me as I find that Burt Bee's has a slightly medicinal scent. But as cute as it was and as good as it smelled, it all boiled down to how well it worked. 


After just half a days use, I could already see a noticeable difference in my cuticles! While I still had some harder skin at the sides of my nails, they already looked and felt much, much healthier. It applied like an absolute dream - nice and light, no greasiness, it absorbed super fast and left me smelling like Chocolate!

After 2 days, my cuticles looked even better. The rough bits started to soften up, as did the rest of my cuticles.

After 2 Days: December 19th, 2014

With continuous daily use for 10 days, all the rough skin was completely gone and my cuticles looked and felt amazing, without any trimming.

After 10 Days: December 28th, 2014

It's safe to say I'm a Cute-icle Balm convert! Not only does it do as good of a job as Burt Bees, it's much lighter, it absorbs faster, it smells delicious and it's also safe to be used as a lip balm. Bonus!

This can be purchased from Powder Perfect for $8 and comes in 3 other scents - Raspberry Brownie, Birthday Cake and Dropped My Jaffas.

Thanks for reading and I hope you give this product a try!

danleekaye
Xx

Sunday 16 November 2014

Review: Powder Perfect Christmas Collection

Hi guys!

Today I have some swatches of Powder Perfect's Christmas Collection, which Jacinta so kindly sent me for review. The collection consists of 1 glitter topper, 4 glitters and 2 crellys.


A few FYI's:

Glisten & Glow HK Girl Topcoat was used as my topcoat of choice in all swatches below. 
I also used two thin coats of PVA Glue as a base coat so I could peel off the polish after each swatch rather than using acetone.


With all that said and done, let's get into it shall we?

The first cab of the rank is the glitter topper.


Candy Canes and Silver Lanes Aglow 

A fun festive glitter topper featuring iridescent glitters alongside matte white and red glitters.

Outdoors - Direct Sunlight

While I'm not usually a fan glitter toppers, I did love how festive this was. It is like Santa Clause's suit in a bottle! Rather than dabbing on one coat to distribute the larger glitters evenly, I chose to use two coats and the glitter to achieve this result.

These photos don't really do the iridescent glitters justice as they were much more sparkly in person.


Shown in the above and below photos is two coats of Candy Canes and Silver Lanes Aglow over Sinful Colors Wispy, OPI Big Apple Red, Sinful Colors Exotic Green and OPI This Gown Needs A Crown plus two coats of topcoat to smooth everything out.


Outdoors - Direct Sunlight

Lightbox Lighting

Outdoors - Direct Sunlight

Next up, we have the glitters.


The Stars Are Brightly Shining

A sparkly silver glitter bomb packed with platinum flakies and a soft gold micro glitter. 


Outdoors - Direct Sunlight
This one is an absolute stunner and my favourite out of the four glitters. I love the simplicity and versatility of it - while it is a perfect Christmas silver, it can also be worn all year round as a full mani or as an accent nail. It is also unlike any other silver glitters in my collection.

Swatches above & below show 3 thin coats plus 1 coat of topcoat, however the glitters were that densely packed, full opacity could easily be achieved in just 2 coats.


Outdoors - Direct Sunlight

Lightbox Lighting


Outdoors - Direct Sunlight


Christmas In A Tropical Climate
summery tribute to Christmas. This golden polish is packed with vibrant gold holographic glitters. 


Outdoors - Direct Sunlight

This one is more of a yellow-gold then a gold-gold, but beautiful none the less. And those holo glitters! Amazing! Totally appropriate for an Aussie Christmas and again could also be worn at any time of the year.

For my swatches, I used 3 thin coats plus one coat of topcoat.


$5 from the sale of each bottle of Christmas In A Tropical Climate will go towards toys for the Kmart Wishing Tree, which helps make Christmas brighter for families in need. To donate, contribute or learn more about this wonderful cause, you can click here.
Outdoors - Direct Sunlight


Outdoors - Direct Sunlight


Lightbox Lighting


Outdoors - Direct Sunlight

Beginning To Look A Lot Like Christmas
A vibrant red glitterbomb with a smattering of gold holographic particles. 
Outdoors - Shade

For someone who doesn't find red flattering, I was surprised that I like both of the reds from this collection so much! The gold microglitters in this polish were subtle but eye catching at the same time, which makes for something different than your traditional red Christmas glitters.

The gold glitters are not so obvious in the first few photos, however are more prominent in the close up photo and certainly more so in person. 

Swatches show 3 thin coats plus topcoat.

Outdoors - Shade

Lightbox Lighting

Outdoors - Shade


Merry Christmas You Filthy Animal!
A deep red microglitter – something a sexy Santa may wear? With flashes of purple this colour is sure to mesmerise you! 

Outdoors - Shade

Firstly, I have to say that the name is just great! I actually laughed out loud when Jacinta first posted it on Instagram.

Merry Christmas You Filthy Animal! is one is a much deeper red than Beginning to Look A Lot Like Christmas and has a perfect scattering of purple  glitters through it although they appeared more blue to me. The contrasting colours make this polish so unique but also Christmas-y at the same time.

Swatches show 3 coats plus one coat of topcoat.

Outdoors - Shade

Lightbox Lighting


Outdoors - Shade
And lastly, we have the crellys.

What Is It With You and Christmas Trees?
A green Christmas tree with adorned with cheery metallic baubles and tinsel… I mean it’s a green crelly featuring colourful metallic glitter that reminds me of my childhood Christmas trees.

Outdoors - Shade

With all the green, red and metallic circle, triangle, hex and bar glitters packed into the green crelly base, this polish is essentially a Christmas Tree in a bottle!

3 coats were needed to reach full opacity and 2 coats of topcoat needed to smooth out all the glitter bumps. 

I did experience a little balding on the second coat however this was due to not letting the first coat completely dry (impatience got the better of me!). All was good once the third coat and top coat were added.


Outdoors - Shade


Lightbox Lighting


Outdoors - Shade
Prettiest Sight To See
A delicate white crelly with feminine purple, cranberry and metallic glitters.

Outdoors - Direct Sunlight

This one is my hands down, absolute favourite of the collection and is so appropriately named.

I am such a sucker for White Crelly Glitters but have been disappointed in the past due to the sheerness of the bases, but not this one. I did not experience any streaking and it was fully opaque in 3 coats. Had I applied it more carefully, I reckon I could have stopped at 2.

To smooth everything out, I did need 2 coats of topcoat.

Outdoors - Direct Sunlight


Lightbox Lighting


Outdoors - Direct Sunlight
Overall, I love love LOOOVE this collection. The formulas on all 7 polishes are exceptional and apply with ease. And not only are they all Christmas appropriate, but most of them are wearable all year round! Bonus!

Polishes can be purchased individually or as a collection here. Also, make sure you're following Powder Perfect on Instgram for swatches and to keep up to date with new collections!

Monday 6 October 2014

How to Avoid Disappointment Buying Nail Polish

It's happened to me many times where I have bought nail polished based purely on photo's I've seen online or simply by how it looks in the bottle. When it comes time to try it out, I die a little inside when I realize it was not what I expected. 

A few month's ago, I purchased Max Factor's Fire Fantasy after seeing many awesome insta-swatches. It wasn't until a saw Very Emily's swatch that I really decided, "I neeeed this in my life!". Shortly after, I found the mini bottle on sale at Priceline so I snapped it up and took it home. So extremely exited to finally have this in my collection, I removed my mani and put a coat straight on and I was shocked! It was sheer and just a bit 'meh' compared to the photos! Giving it the benifit of the doubt, I applied two more coats and you could still see my nail line, which i absolutely hate!

"Why? Why did my Fantasy Fire not look like Very Emily's Fantasy Fire?", I asked myself. So I went back and had a look at her blog post to find she'd layered it over OPI's Euro Eurso to get the beautiful, opaque colour and depth. 

Left: Sheer with 3 coats of Fantasy Fire (note piece of glitter is at back of nail)
Middle: Opaque with 1 coat of OPI Euro Eurso + 2 coats of Fantasy Fire
Right: 
Opaque with 1 coat of Ulta3 Black Satin + 2 coats of Fantasy Fire
Did I regret my purchase? No! But was I dissapointed? Heck yea I was! 
I'm sure I'm not the only one with this problem, so below are some tips that have helped me avoid such disappointment and stop wasting money. I apologize in advance for the length of this post! I maybe got a bit carried away.

*Disclaimer* These tips are based on my own personal experiences and will not guarantee that you will never buy a nail polish you don't like or are not 100% happy with. 

Tip #1: Read the description:
As I mentioned, I have brought polished based purely on swatch photos and become extremely disappointed with the result IRL. When I have gone back to where I bought it from and actually read the description, it is clearly noted it is a sheer jelly that has been layered over a darker colour in the swatch photo or that it needs 4 coats to reach full opacity. Ugghh!

Most online shops, particularly indies, will have information such as the colour, finish (gloss, matte, jelly, creme, shimmer, etc.), how many coats are shown in the swatches, if and what topcoat was used and if they recommend layering it over a base colour. If they don't have this information, you can always do some researching. Which brings me to my next tip.

Tip #2: Research:
Before buying a polish based on swatch photos or how it looks in the bottle, do some googling and read some blog reviews - see what people have to say about it. It may be hard to do this when you're at a store but if I can, I always do!

Bloggers are often sent products by the companies or makers to express their honest opinions on things such as the formula & the way it applies, the colour & finish and their overall thoughts on the polish or polishes. They will almost always include how many coats they used and if they used a top coat - this is important to take into consideration when deciding.

Another thing to consider is that some bloggers will have different opinions and their photos will sometimes look slightly different colour wise due to lighting. For this reason, I read as many reviews and blog posts as I can to see if I can find some consistency. If I am finding that multiple people are saying a polish is streaky, there's a good chance I won't buy it, no matter how good the swatches look! However if I find that only one or two say this and the rest say it applies well or they loved the formula, I will buy it.

Some of my favorite, go-to nail bloggers are Peachy Polish, Fierce Makeup & Nails and The Polish Aholic, Look What The Bats Dragged and Serenity Nails.

Tip #3: Wait for sales:
There's nothing worse than buying a full priced polish that you're not 100% sold on. Most companies, whether online companies or stores, post these on their Facebook and/or Instagram pages. Also keep an eye out at your local beauty stores, pharmacies/drug stores, etc for sales.

That being said, don't just buy it because it's on sale! I've ended up having heaps of bottles that only cost me a few bucks each that I never use. With all the money I spent for the sake of it, I could have brought a few more expensive ones I'd actually use.

Tip #4: If in doubt, don't buy it:
This ones pretty self explanatory. If your not sure you'll like it colour wise, formula wise or even if you think you'll only use it once and never again, don't buy it.

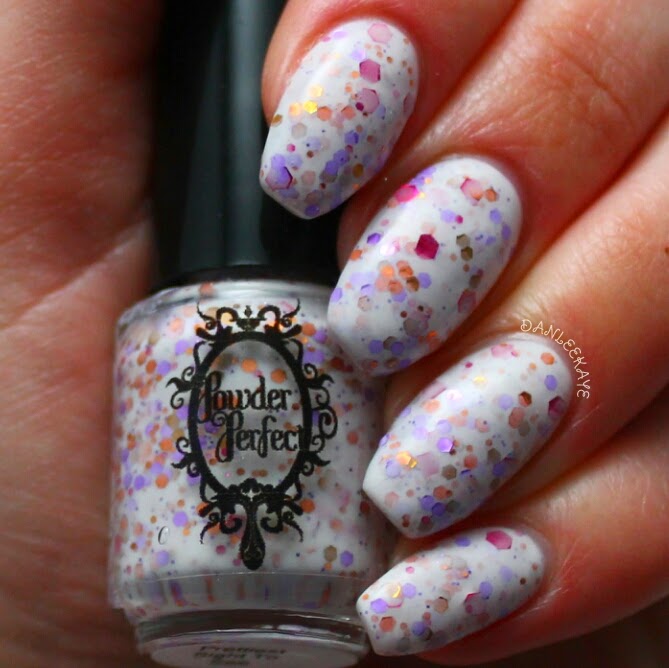
Tip #5: Dont knock it til you've topcoated it:
Some polishes (especially ones with glitter, in my experience) are not done justice until a topcoat is added. For example, I brought Powder Perfect's Storm Rainbow after seeing so many good reviews and swatches, but as I was applying it I had my doubts as to whether it was all it was cracked up to be. It was duller and not as blingy as what I had seen. 

That was until I added a coat of HK Girl topcoat and that was when the magic happened. It smoothed it out and brought out the holo, shiny goodness I'd seen and heard about. This goes for any polish though - until you add a topcoat, you can't be sure whether you love it or hate it.

I hope these tips help you in your future polish buying endeavors. What are your best tips for avoiding disappointment?

Friday 19 September 2014

My Nail Care Routine

Hi guys! Welcome to my very first blog post! I've decided to keep it simple and a little cliche and share with you my nail care routine. All products listed have been purchased with my own money.


Before I get into it, I should mention that I have an acrylic overlay on my natural nails, so the care of my actual nails is pretty average. I've never been able to grow my nails long without them breaking so acrylics were my solution to that. If I could, I would love to grow out my natural nails, however just don't have the patience, so continue with acrylics I shall. No judgement please!

Base Coat:
Due to the acrylic overlay, there's no point in me using a base coat to strengthen and protect my natural nails. I do, however use a UV topcoat purchased from eBay to smooth and even out the nail after I file down any lifting that occurs near the cuticle area. I do this before I paint my nails when it is needed - usually once a week depending on how much liftage there has been. I use a small 9W UV lamp, also from eBay, to cure the topcoat for a few minutes and then use a cotton pad and some methylated spirits to remove any stickyness. I then paint my nails as normal.


Cuticle Care:
With all the filing down of my acrylics and acetone used to remove polish, my cuticles tend to get a bit rough. To keep them as soft as possible, I use Burt's Bee's Lemon Cuticle Balm. I use this several time each day and have 3 of the mini 8.5g balms - one at work, one in my handbag and one by my bed.

I try to avoid trimming my cuticles and push them back with my thumb nail or my cuticle pusher after a shower. Sometimes, especially after a refill, I do trim any jagged bits and any hangnails with my Manicare Cuticle Clippers.

Even though I do the best I can to keep them my cuticles in good condition, they aren't perfect. As you can see below, there has been a big improvement from when I wasn't doing anything at all!

Feb 2013                             August 2014

Hand Care:
To keep my hands silky smooth, I use a couple of products. 

During the day, I use Garnier Intensive 7 Days Protecting hand cream, which I keep in my handbag. As the tube states, it is fast absorbing, non greasy and intensively moisturizing. It also smells great which is an extra added bonus! I put this on in the morning and during the day depending on how dry my hands are feeling. At first, I was applying as much as I would with the hand cream I had before this and it wasn't absorbing very quickly. Now, I only use a pea sized amount and am getting a much better result.

Before I go to bed most nights, I put on a generous amount of Burt's Bees Almond Milk Beeswax Hand Cream and pop on my moisturizing gloves to stop it wiping off on my sheets while I sleep. It's not as fast absorbing as the Garnier cream, which is why I don't use it during the day, but it's still my number one favourite. It makes my hand super soft by the time I wake up and I also love the smell. I've had this tub for almost a year and I still haven't used it all!


If you made it to the end of this, thank you and well done! If you have any questions about the products used, please ask.